


Glass Craftsmanship Techniques: Behind the Bench
- 4 days ago
- 12 min read
Most people see a finished stained glass window and think about light and color. What they rarely consider is the years of accumulated skill, the specific tools worn smooth by use, and the exact sequence of decisions that turned raw glass into something permanent and meaningful. Glass craftsmanship techniques are not a checklist you can look up and replicate overnight. They are a body of knowledge built through repetition, failure, and refinement. This article pulls back the curtain on what actually happens in a working glass artisan studio, using the real methods practiced at Aldie Glassworks to show you what mastery looks like from the inside.
Table of Contents
Quick Takeaways
Key Insight
Explanation
Glass cutting is 90% pressure management
A consistent, even score line determines whether a cut follows your intended path. Too much pressure causes subsurface fractures; too little leaves an incomplete score.
Lead came selection affects structural life by decades
H-came and U-came have distinct roles. Choosing the wrong profile for a large architectural panel can cause buckling within five years.
Kiln temperature curves matter as much as peak temperature
Ramping too fast when firing vitreous glass paints causes micro-cracking. The ramp rate, not just the final temperature, defines the result.
Pattern accuracy is the single biggest variable in final fit
A pattern deviation of just 1/16 inch compounds across a multi-panel installation, creating gaps that compromise both aesthetics and waterproofing.
Copper foil and lead came are not interchangeable methods
Copper foil (Tiffany method) suits intricate, smaller pieces. Lead came is structurally superior for large architectural windows above 4 square feet.
Restoration demands matching original glass, not modern equivalents
Antique mouth-blown glass has surface irregularities that modern rolled glass cannot replicate visually. Substituting one for the other is immediately visible under light.
Studio lighting conditions directly affect color decisions
Glass color chosen under fluorescent studio light will read differently in natural transmitted light. All final color approvals at Aldie Glassworks happen against a daylit light table.
The Workbench Environment: Where Craft Begins
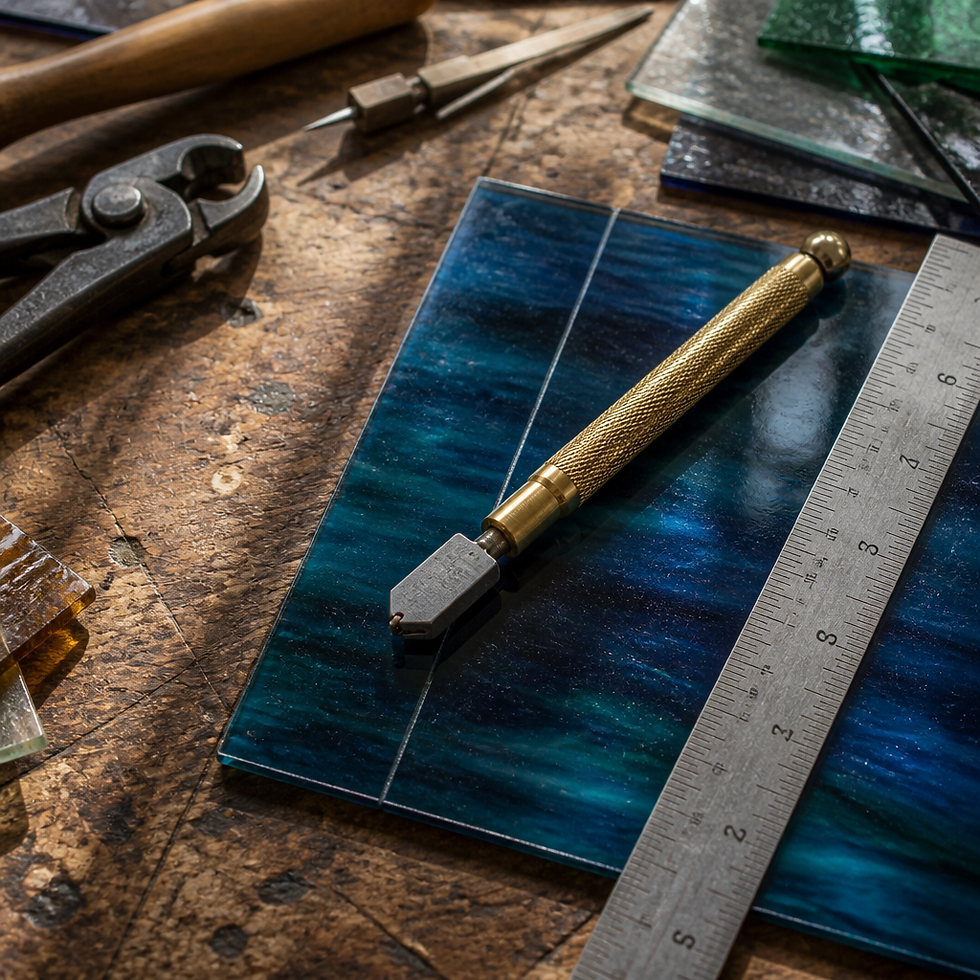
A professional glass artisan studio is organized around one principle: every tool needs to be within reach without stepping away from the work. In practice, the bench layout is not aesthetic preference but functional necessity. When you are holding a scored piece of glass that needs to break cleanly in the next three seconds, you cannot be searching for your running pliers.
At Aldie Glassworks, the studio in Leesburg, Virginia is configured so that the light table, the cutting surface, the lead vise, and the soldering station form a tight working triangle. This reduces the handling distance a fragile scored piece must travel before it is either broken out or set into a panel. Handling distance is a real variable in breakage rate, and experienced studios design their spaces to minimize it.
The surface material on a cutting bench matters more than most beginners expect. A soft fiberboard surface, sometimes called homasote board, allows glass pieces to be pinned in place with horseshoe nails during leading without scratching the back face. A hard surface like plywood or MDF causes the glass to slide during cutting and damages the tin-oxide surface on some specialty glasses, which affects how solder adheres later.

Pro tip: If you are commissioning a custom glass installation and visiting a studio for the first time, look at bench organization before you look at finished samples. A chaotic studio with tools scattered across multiple surfaces is a signal about how the work itself is managed.
Essential Stained Glass Tools and What They Actually Do
The term stained glass tools gets used loosely, but there is a meaningful hierarchy between tools that are optional and tools that define whether the work is possible at all. Understanding the distinction helps clients appreciate why quality studios invest in professional-grade equipment rather than hobbyist equivalents.
Cutting Tools
The steel wheel glass cutter, typically with a tungsten carbide cutting wheel of 0.9mm to 1.1mm diameter, is the most fundamental instrument in the studio. The wheel diameter affects the curve radius achievable on tight pattern pieces. A 0.9mm wheel handles tight inside curves that a standard 1.1mm wheel will blow out on.
Glass cutters are used with cutting oil, usually kerosene-based or purpose-made lubricant, applied either by dipping or through a self-oiling reservoir handle. Dry scoring leaves a white powdery residue on the score line and produces a score that is 30 to 40 percent more likely to run off-path. This is not a debated point among professional glass craftspeople. It is simply what happens.
Circle cutters and strip cutters are specialized versions that use the same scoring principle but with guides that maintain a fixed radius or width. For architectural glass with repeating geometric elements, these tools reduce cumulative pattern error significantly compared to freehand scoring against a straightedge.
Breaking and Grozing Tools
Running pliers apply equal pressure on both sides of a score line simultaneously, initiating a clean break from the score. Grozier pliers, sometimes called combination pliers, have a flat jaw and a curved jaw that allow the artisan to nibble small amounts of glass from an edge to refine a curve. A common mistake is using groziers to make large corrections instead of re-cutting. Groziers remove glass in small fractures; they do not cut cleanly. Using them to fix a bad cut produces a ragged edge that shows through came or foil.
Leading and Soldering Tools
The lead knife is a heavy, lozenge-shaped blade used to cut lead came at precise angles, particularly 45-degree miter cuts at corners and junctions. A blunt lead knife is one of the most common causes of poor lead joints. The knife should be sharp enough to cut lead came in a single rocking motion without displacing the lead channel walls.
Soldering irons for stained glass work are temperature-controlled units operating between 700 and 900 degrees Fahrenheit. Hobby irons without temperature control overheat came, causing it to oxidize rapidly and reject solder adhesion. Professional studios use irons with rheostat controls that maintain a consistent tip temperature throughout a long soldering session.
Cutting and Scoring: The Foundation of Every Piece
Every piece of glass in a custom installation at Aldie Glassworks begins as a flat sheet that must be cut to a paper or digital pattern. The accuracy of that cut determines whether the panel assembles correctly, whether the lead lines follow the design intent, and whether the finished piece fits its opening. There is no corrective step later that compensates for a bad cut made at the beginning.
Scoring is not cutting. The wheel does not remove material. It creates a controlled stress line in the glass surface by displacing molecules in the silica matrix. The break that follows is the actual separation, and it follows the score line only if the score was consistent. An inconsistent score, one where the cutter lifted or the pressure varied, will cause the break to wander or to produce a conchoidal fracture rather than a clean edge.
The technique for straight cuts differs meaningfully from the technique for inside curves. Straight cuts use a single fluid pull or push motion with continuous pressure. Inside curves require the artisan to release and reapproach the glass several times, making multiple relief cuts that remove wedge-shaped pieces of glass progressively until the curve is clean. Attempting to snap an inside curve in one break is a reliable way to lose the piece entirely.
"The score line is a conversation between the cutter and the glass. The glass tells you what it will and will not do. The craftsman's job is to listen before applying force." - Traditional glass studio principle cited in the Corning Museum of Glass technical archives.
Pro tip: When ordering custom glass work for a church or architectural installation, ask your studio how they handle inside curves on detailed figurative panels. The answer tells you immediately whether they have the depth of experience your project requires.
Leading and Soldering: Holding the Vision Together
The lead came system is what makes a stained glass panel a structural object rather than a collection of loose glass pieces. Lead came is an extruded lead alloy channel, H-shaped in cross-section for interior joints and U-shaped for border edges, that holds adjacent glass pieces in place while allowing for the thermal expansion and contraction the panel will experience over decades.
Stretching lead came before use is a step many hobbyists skip, but no professional studio omits it. Unstretched came is soft and will compress under the pressure of adjoining glass pieces, causing bulging and an uneven surface. Stretching it by 5 to 8 percent in a lead vise aligns the crystal structure and gives the came the stiffness needed to hold panel geometry.
Soldering Technique and Joint Quality
Solder joints in stained glass work are not purely mechanical connections. They are visible design elements because they appear as raised nodes at every intersection of lead lines. A properly soldered joint is smooth, slightly domed, shiny, and consistent in size across the panel. A cold joint, one where the iron was not hot enough or moved too quickly, appears dull and granular and will crack under stress.
The flux applied before soldering is chemically active and must be neutralized after soldering is complete. Leaving flux residue on a finished panel causes ongoing corrosion of the lead came over years. The neutralizing wash, typically a mild solution of baking soda and water, is a non-optional finishing step that protects the panel's structural integrity for the long term.

Cementing or glazing compound is worked into the came channels after soldering to fill the gap between the lead and the glass surface. This step waterproofs the panel and stiffens the overall structure by bonding the glass to the came across the full contact surface. Panels that skip this step flex under wind load and develop rattles or failures within a few years, particularly relevant for exterior church windows in Virginia's variable climate.
Glass Painting and Kiln Firing Techniques
Not all glass artistry is cutting and leading. Painted glass involves applying vitreous glass paints, which are powdered metal oxides suspended in a gum arabic or oil medium, directly to the glass surface and then firing the piece in a kiln to fuse the paint permanently into the surface. This technique is what creates the shading, facial detail, and tonal variation seen in figurative windows.
The most common vitreous paints used in traditional glass painting are iron oxide-based for brown and black lines, copper oxide for greens, and cobalt for blues. These paints fire at temperatures between 1,050 and 1,150 degrees Fahrenheit. The glass itself begins to soften slightly at these temperatures, which is what allows the paint oxides to bond into the surface rather than simply sitting on top of it.
Kiln Firing Schedules
A firing schedule is the planned sequence of temperature increases, holds, and decreases that a kiln follows during a single firing cycle. The ramp rate from room temperature to peak firing temperature is critical. Too fast a ramp, anything above approximately 300 degrees Fahrenheit per hour for most architectural glass, causes thermal shock that produces hairline cracks invisible to the eye until the panel is installed and back-lit.
The annealing phase, which is the controlled slow cooling from peak temperature down through the glass transition range, prevents internal stress from building up in the glass. Skipping or shortening the anneal is the single most common cause of kiln-fired glass developing spontaneous fractures weeks or months after installation. The Corning Museum of Glass identifies improper annealing as the leading cause of premature failure in fired glass artwork.
Tool and Method Comparison: Traditional vs. Modern vs. Hybrid
The question of which approach produces better work is less important than understanding what each method is suited for. At Aldie Glassworks, the method is chosen based on the specific demands of the project, not studio preference or tool availability.
Approach
Best Application
Key Limitation
Traditional Lead Came with Hand Cutting
Large architectural panels, church windows, restoration projects requiring period-accurate technique
Time-intensive; requires high skill level for consistent results across large repeating patterns
Copper Foil with Band Saw Assist
Intricate figurative or decorative pieces under 4 square feet; residential art glass
Not structurally appropriate for large unsupported panels; foil line width limits design boldness
Hybrid: CNC-Guided Pattern Cutting with Hand Leading
High-volume architectural commissions with repeating geometric elements; projects requiring pattern precision above 1/32 inch tolerance
CNC equipment investment is substantial; does not replace hand skill in the leading and soldering stages
The hybrid approach is increasingly common in studios handling large commercial or institutional commissions. The CNC router or waterjet cutter provides pattern accuracy that hand-cutting cannot consistently achieve across dozens of identical pieces. But the leading, soldering, cementing, and finishing steps remain entirely hand-executed. The tools changed; the craftsmanship requirement did not.
Restoration Work: When the Technique Demands More
Restoration of historic stained glass windows is technically more demanding than creating new work, and most studios do not have the range of skills it requires. The Aldie Glassworks team handles restoration for churches and historic properties throughout the Northern Virginia region precisely because restoration combines every technique described in this article simultaneously, applied to glass that may be 100 years old and irreplaceable.
The first challenge in restoration is condition assessment. A restorer must identify which glass pieces are original and which are prior replacements, which lead sections are structurally sound and which are fatigued, and whether the panel has suffered any buckling or bowing that indicates inadequate support. This assessment requires examining the panel both in transmitted light and in reflected light, because each reveals different defect types.
Matching Antique Glass
The central material challenge in restoration is sourcing glass that matches original antique glass closely enough that the repair is not visible. Antique glass made before the mid-20th century was primarily mouth-blown and cylinder-drawn, processes that produce characteristic surface irregularities, slight color variations within a single sheet, and a particular way of bending light that modern machine-rolled glass does not replicate.
Reputable suppliers of antique and restoration glass include Lamberts of Germany and Hartley Wood in the UK, both of which still produce mouth-blown glass using traditional methods. Specifying the correct glass type for a restoration project is not optional detail work. It is the difference between a restoration that preserves the window's artistic integrity and one that simply patches a hole.
Structural Reinforcement
Large historic windows that have suffered structural lead fatigue are typically re-leaded entirely rather than patched. Re-leading involves carefully removing every piece of glass, cleaning them, cutting new came to the original dimensions, and re-assembling the panel on a new pattern traced from the original. Saddle bars, which are horizontal steel or copper bars installed in the window opening, are used to support the panel weight and prevent future bowing. Sizing these bars correctly for the panel dimensions and the building's wind exposure is an engineering consideration, not purely an aesthetic one.
Frequently Asked Questions
What is the difference between copper foil and lead came techniques?
Copper foil, popularized by Louis Comfort Tiffany in the late 19th century, involves wrapping each glass piece in a thin copper tape and then soldering the foiled edges together. Lead came uses extruded lead channels to hold pieces in place. Copper foil allows for tighter curves and smaller detail work, while lead came is structurally superior for large panels and is the method required for most church window restorations where period accuracy matters.
How long does it take to complete a custom stained glass commission?
A single residential decorative panel under 4 square feet takes approximately two to four weeks from approved design to installation, assuming no complex firing requirements. A full architectural window for a church or commercial building can require four to six months, depending on the number of panels, the complexity of the painted work, and the number of kiln firings needed. Rushed timelines compromise quality at every stage of the process.
What should homeowners know before commissioning custom architectural glass?
The most important thing to understand is that custom architectural glass is not a commodity purchase. The design process, material selection, and fabrication all involve decisions that affect how the piece will look and perform for decades. Homeowners should expect a collaborative design phase, a formal pattern approval step before any glass is cut, and a clear conversation about installation requirements and any structural support the opening needs.
Why does antique glass look different from modern glass in a restored window?
Antique glass was made using processes that introduced natural surface variation, slight thickness inconsistencies, and small air bubbles or cords into the material. These imperfections scatter and refract light in ways that give historic windows their characteristic luminosity. Modern float or rolled glass is optically uniform, which means it transmits light flatly and without that characteristic variation. When you see a patch in a historic window that looks visually flat compared to the surrounding glass, it is almost always a modern glass replacement made without attention to material matching.
How do I know if a glass studio has the skills needed for church window restoration?
Ask specifically about their experience with re-leading historic panels, their sources for antique and restoration glass, and whether they have worked with panels that required kiln-fired vitreous paint restoration. Request to see photographs of completed restoration projects, not just new work. A studio capable of restoration should also be able to discuss how they assess structural condition and what their approach is to matching existing glass types. Vague answers to these questions are a meaningful signal.
What maintenance do stained glass windows require after installation?
Stained glass panels installed in exterior openings should be inspected every five to seven years for lead fatigue, solder joint cracking, and cement deterioration. Interior decorative panels require significantly less maintenance but should be cleaned with mild soap and water only, never with abrasive products or ammonia-based cleaners, which attack the lead surface. Panels showing any visible bowing or bulging should be assessed by a professional immediately rather than left until the next scheduled inspection cycle.
Have you worked with a glass artisan on a custom or restoration project? Share what surprised you most about the process in the comments, or reach out to the Aldie Glassworks team to discuss what your project requires.


Comments